today, we’re going to set up our project for quest3
before we start the post, if you need a unity instructor to guide you in a 1-1 session, please take a look at the unity instructor post.
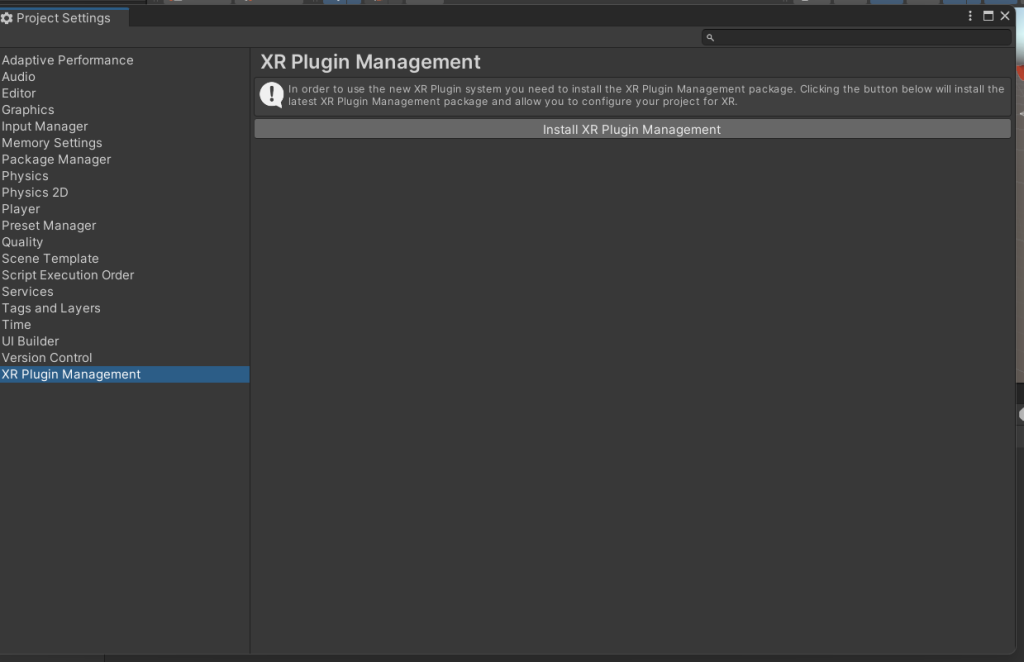
Installing XR plugin Management
- We must install XR plugin Management from Edit/Project settings/XR plugin Management.
Installing the OpenXR
2. Then choose Windows Tab and click on the OpenXR
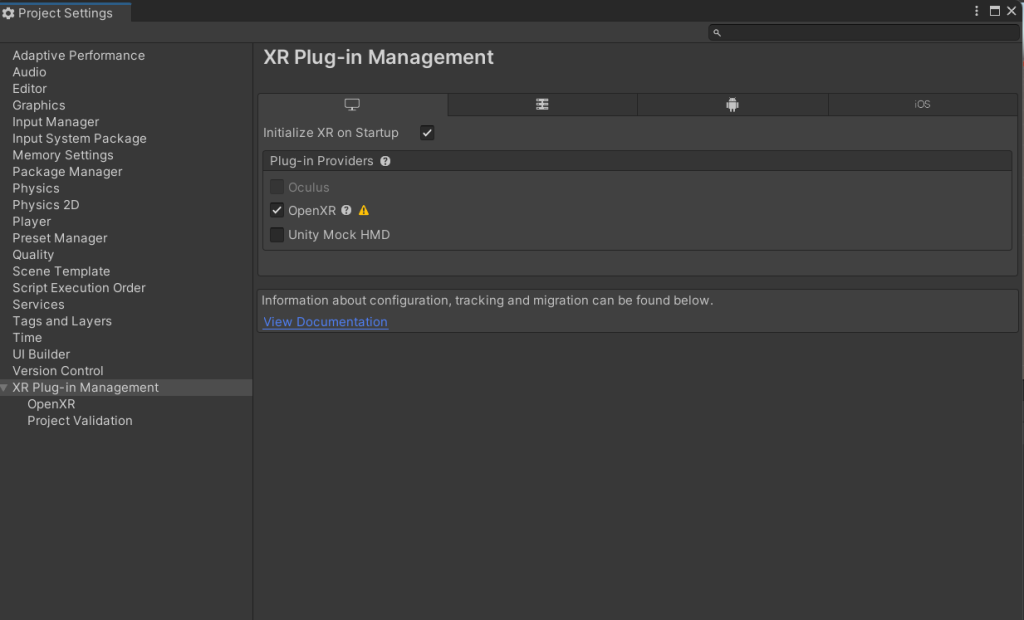
Add at least one profile
3. add a profile to remove the warning you get after you install the OpenXR

Installing the XR interaction toolkit
4. from the package manager, we should install the XR interaction toolkit by Windows/package manager/there is a drop-down (choose unity registry)/search XR interaction toolkit then download and import it. There is a samples tab where you should import starter assets.

5. a folder added to your project is the starter assets folder. We should add some of the presets to the input action asset. (top right in the inspector, we have to click on the add to actionBasedController default.)Normally, you should add XRI Default continuous Move/Turn/Left controller/Right controller/Snap turn.

6. We have to separate right-hand references from left-hand hand. To do that, we click on the edit/project settings/preset manager, and then we write “Right” for the right controller and “Left” for the left controller.

7. Now our project is ready to test, we need to add the XR origin (VR) and locomotion system(action-based) Objects to the hierarchy. Right-click on the hierarchy, then XR/XR origin (VR) and locomotion system(action-based).

If you have any questions about how to implement the VR project for quest3, please reach out me